The BIG UNVEILING!

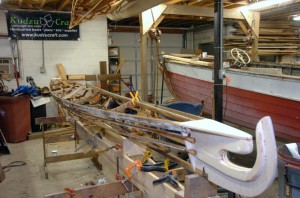
I did not plan on posting again till it was ready to go to the water, but I hit a little snag and decided to go ahead. I think I am at about 98% finished I just have a few details to take care of and I don’t think I will finish today. I hit my head yesterday and I still have a bit of dull  headache, so I am taking it easy and not pushing to get done.  I decided to go ahead with the ‘Big Reveal’ today anyway.

Click on the images to see them full size.

jeffs-32 jeffs-33

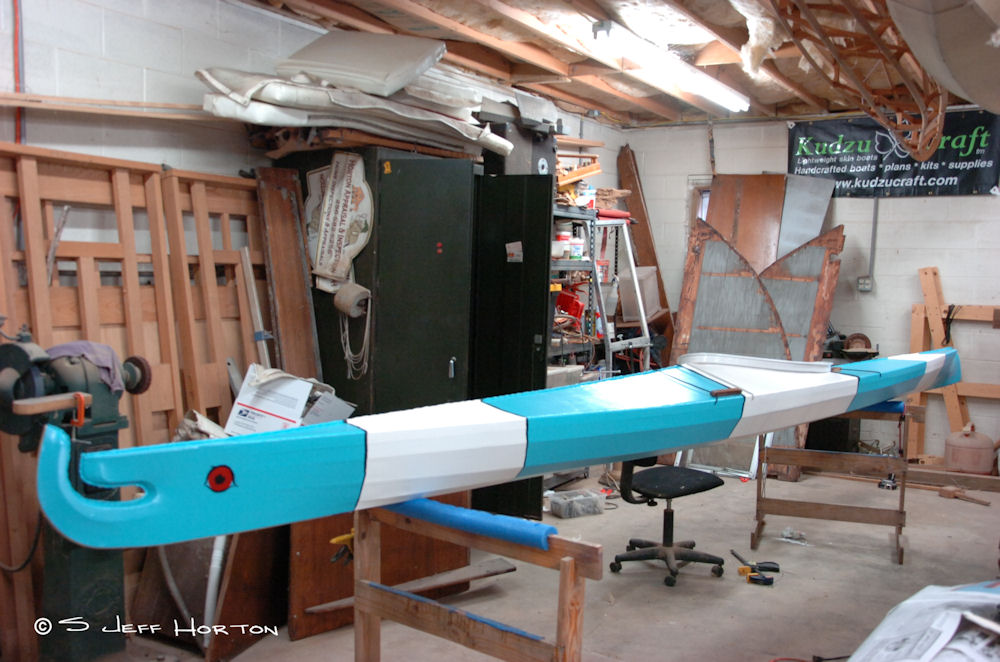
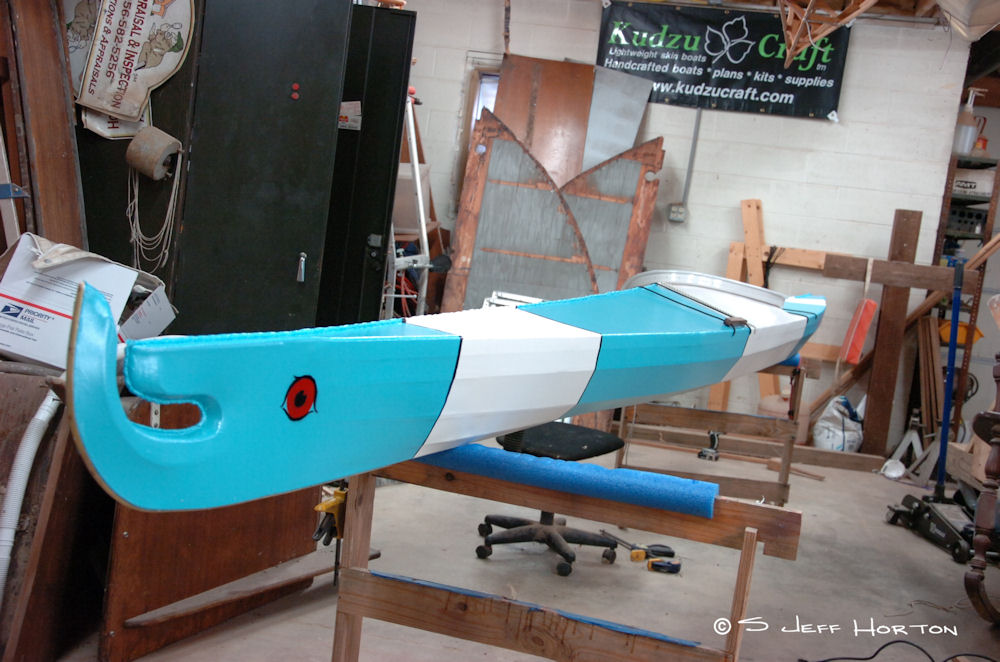
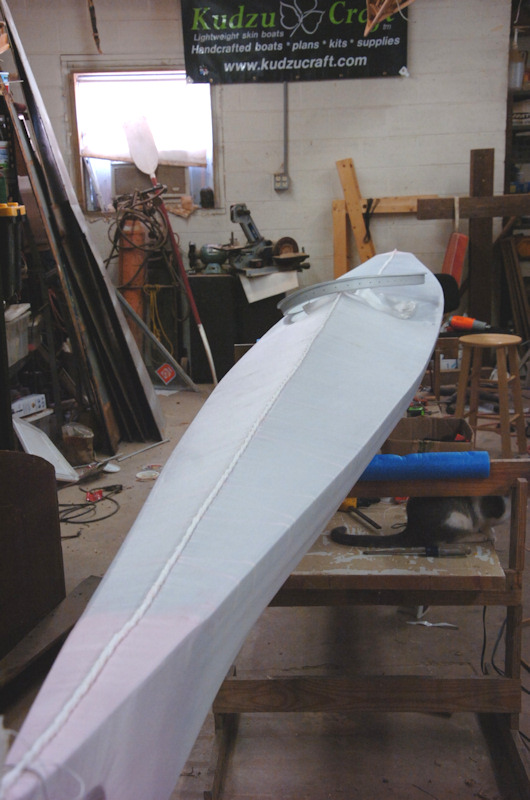
Like it or not, I love the paint job. I have been thinking of this since I did ‘Nemo’, the orange and white Curlew. I played around with colors when I painted Nemo and Nemo was almost painted these colors!

But I wanted to surprise John Redmond who gave me the idea.  John had posted a photo of a Clown fish and said ‘Jeff, why don’t you paint one like this?” Had it not been for that I would have used these colors.

jeffs-34

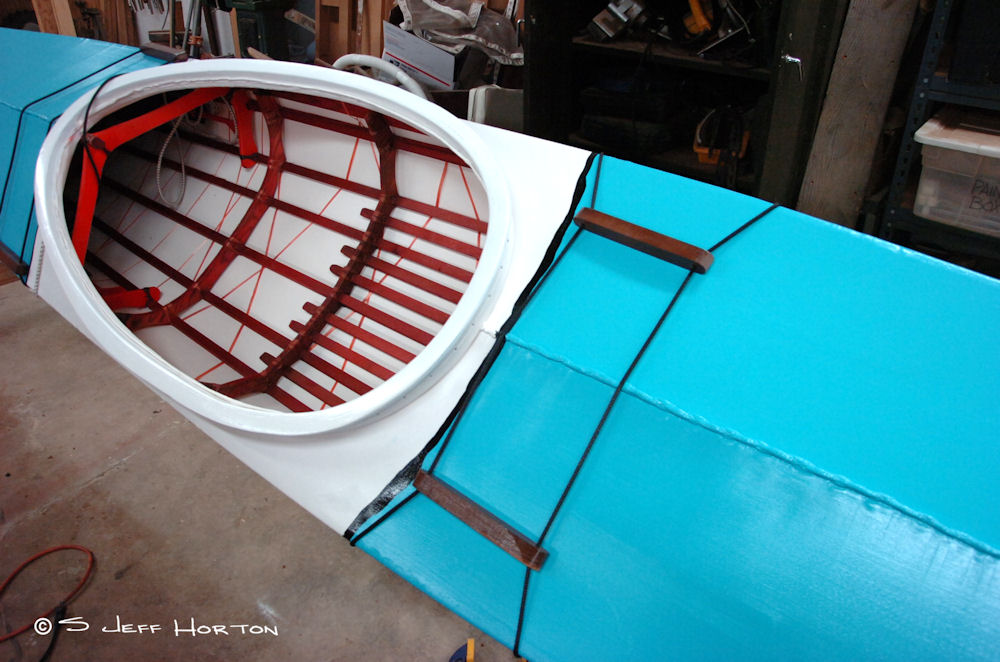
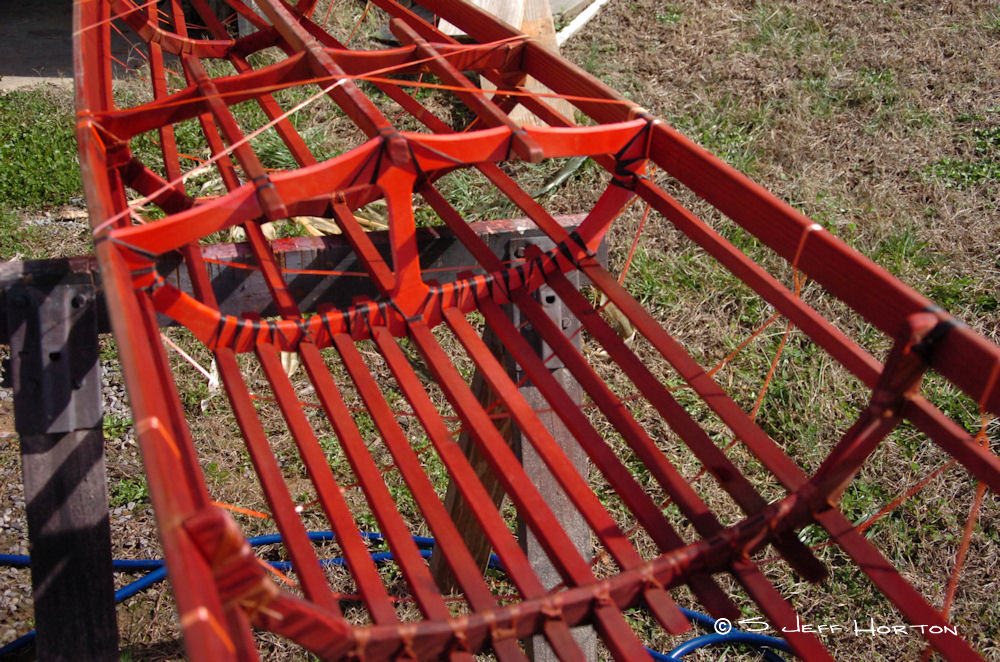
I used toggles and polyester rope instead of bungee. Toggles have the advantage of being able to  slide your paddle under them, spread the toggles apart and they will tighten, wedging your paddle across the boat. With the blade in the water it makes a big difference in the stability of the boat. It dampens the boats movements so it doesn’t roll nearly as fast on you. It is great for wet entries and much faster to deploy than a paddle float since there is nothing to find nor inflate. I put them front and back on this boat since the rear ones would get in the way during a cowboy scramble style of reentry.

jeffs-35

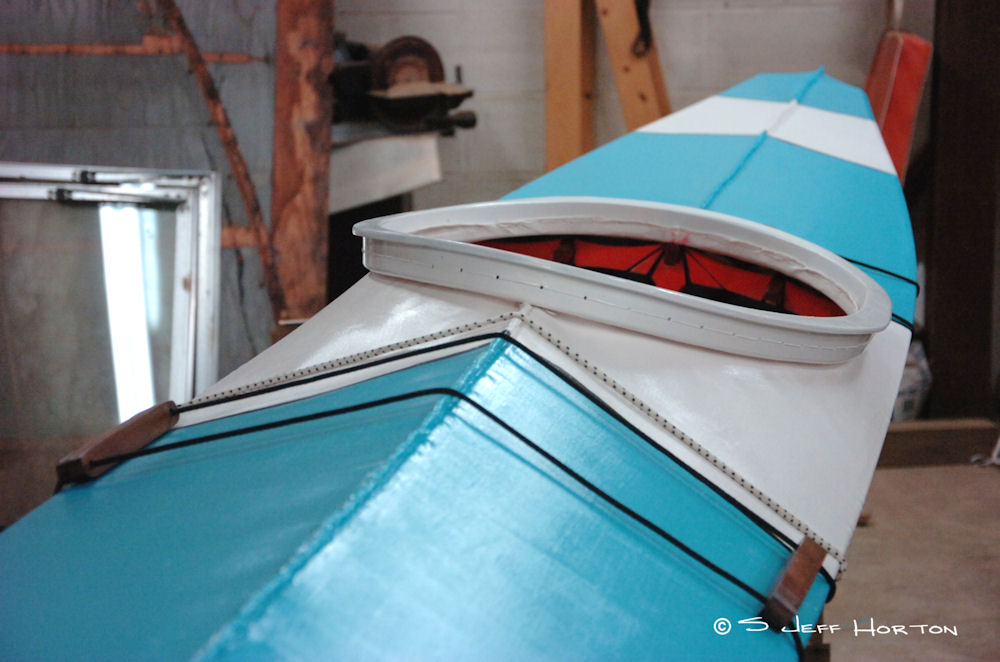
I put a singe white bungee right in front of the cockpit so I have a place to put gloves or a hat or something small and I don’t have to fiddle with tightening the toggles. Since I rarely carry anything other than a spare paddle on the deck the  single bungee is perfect for my needs.

jeffs-36

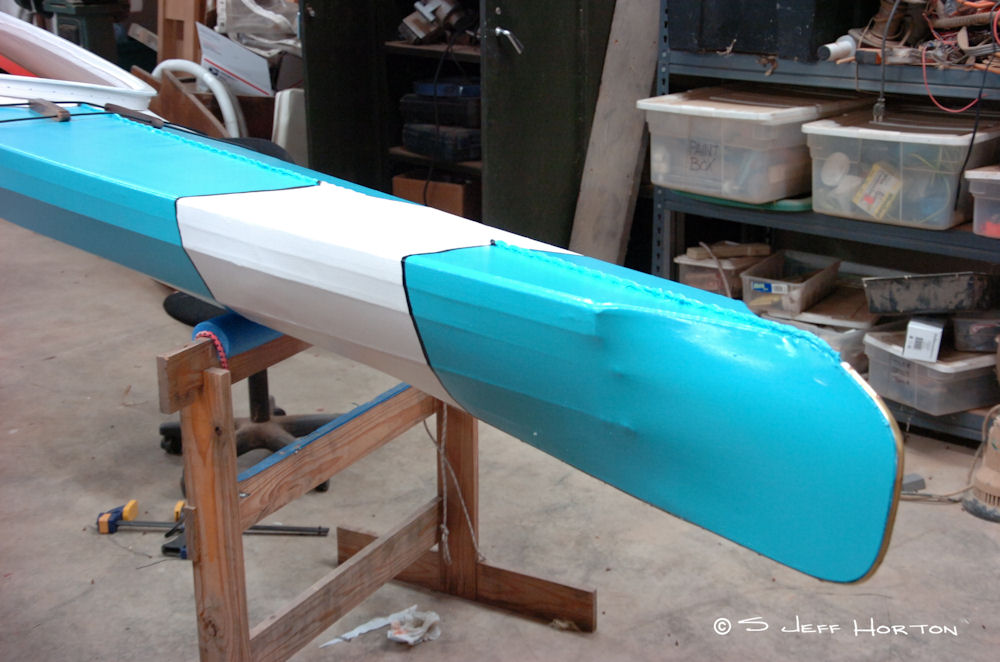
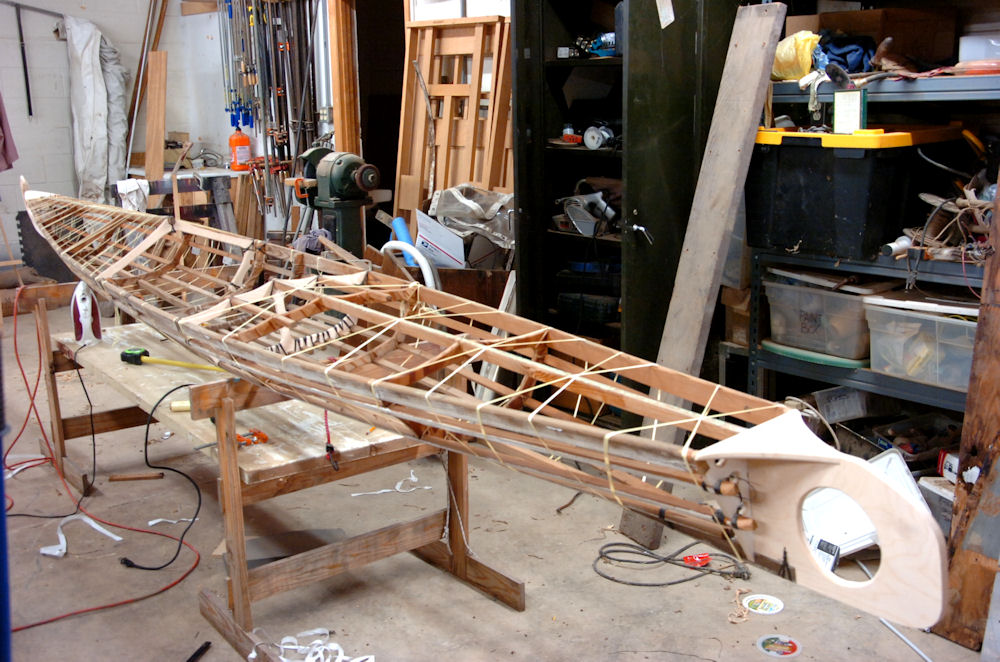
I am well pleased the way the stern turned out.  I wrapped it with a brass stemband using  #4 bronze screws to anchor it in place. There is a bead of caulking underneath it to bed it and seal the screw holes.

jeffs-37
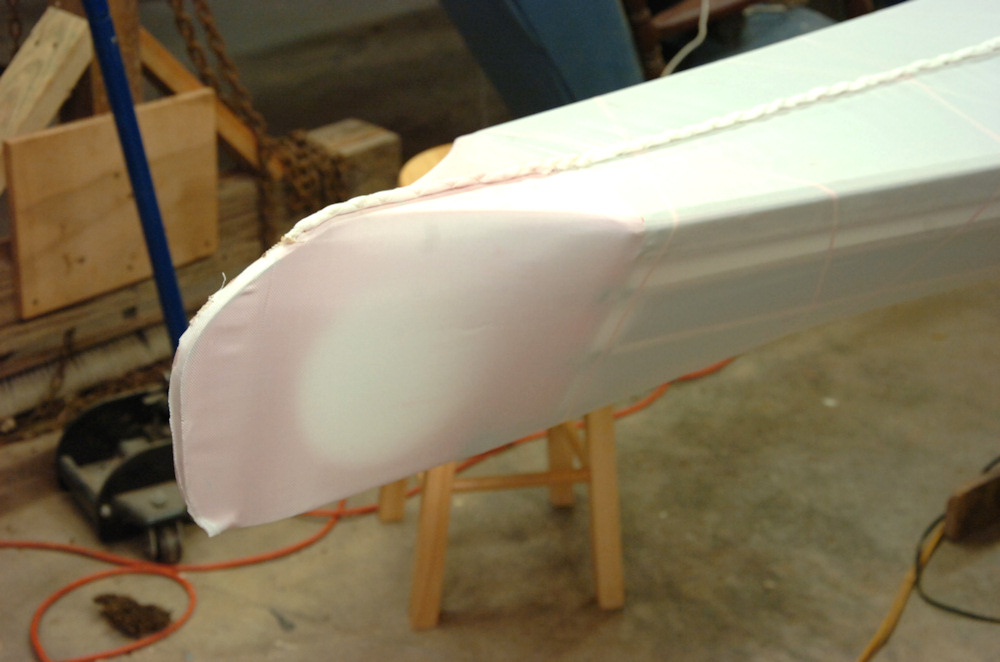
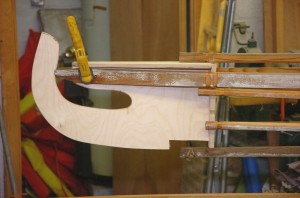
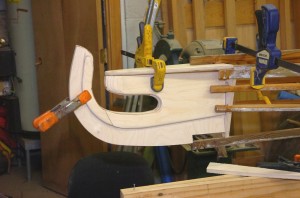
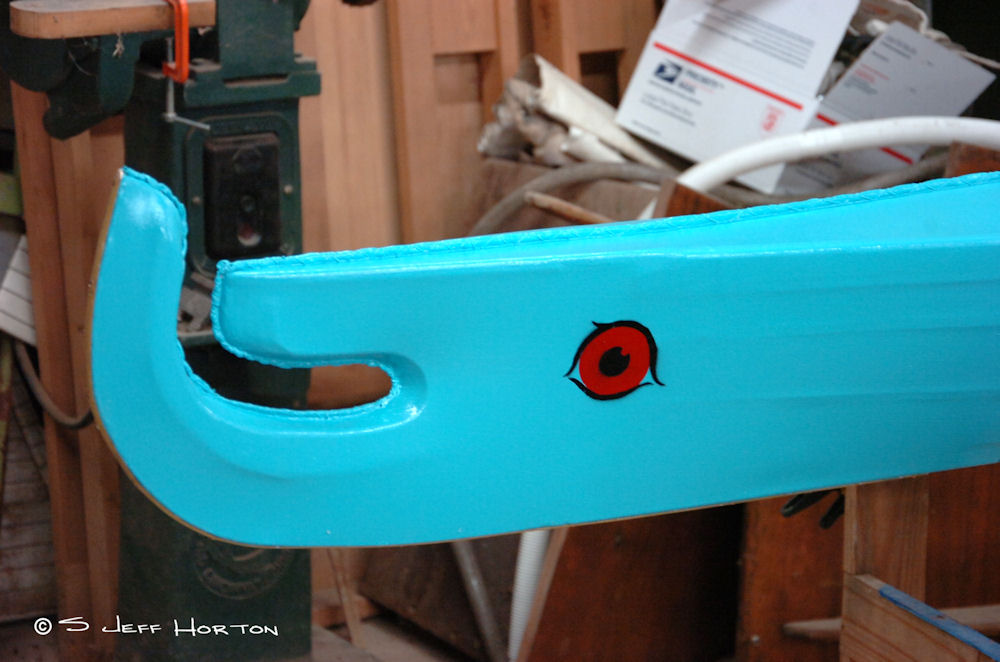
The bow is my favorite part of the boat. I have always wondered if the Bifid bow wasn’t inspired by the mouth of something the Inuits hunted. Maybe a way to pay tribute to the animal or animals.This style of Bifid always made me think of the Salmons appearance once it changes during the breeding run up the rivers. That is a large part of why I wanted eyes on this boat.

I am not quite finished painting the eye. I need to add some white highlights to it but the black was still wet when I took this photo. It will be tomorrow before it’s dry enough to paint those.

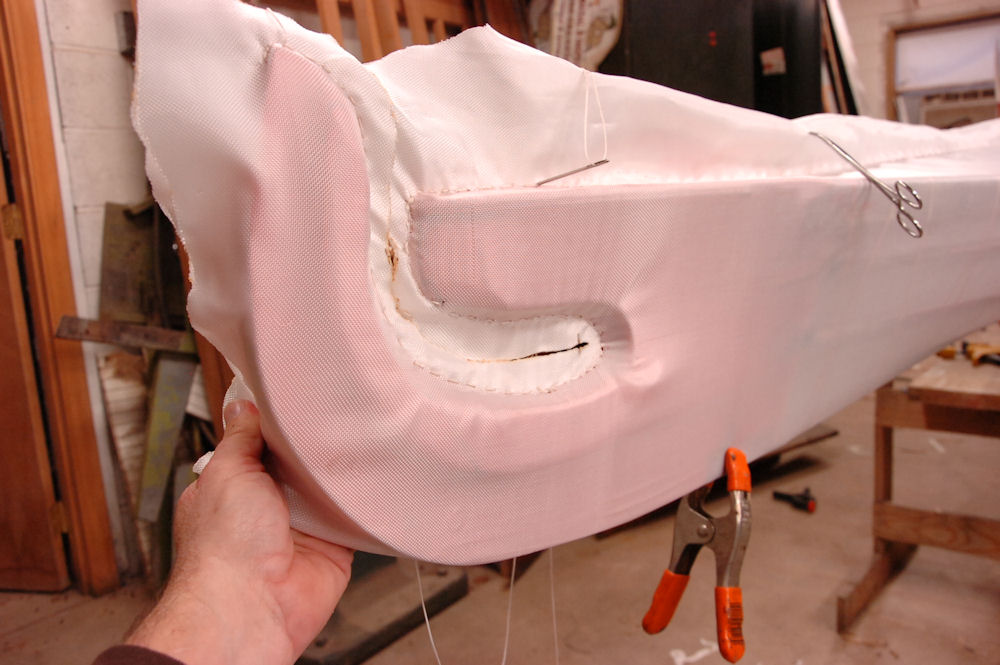
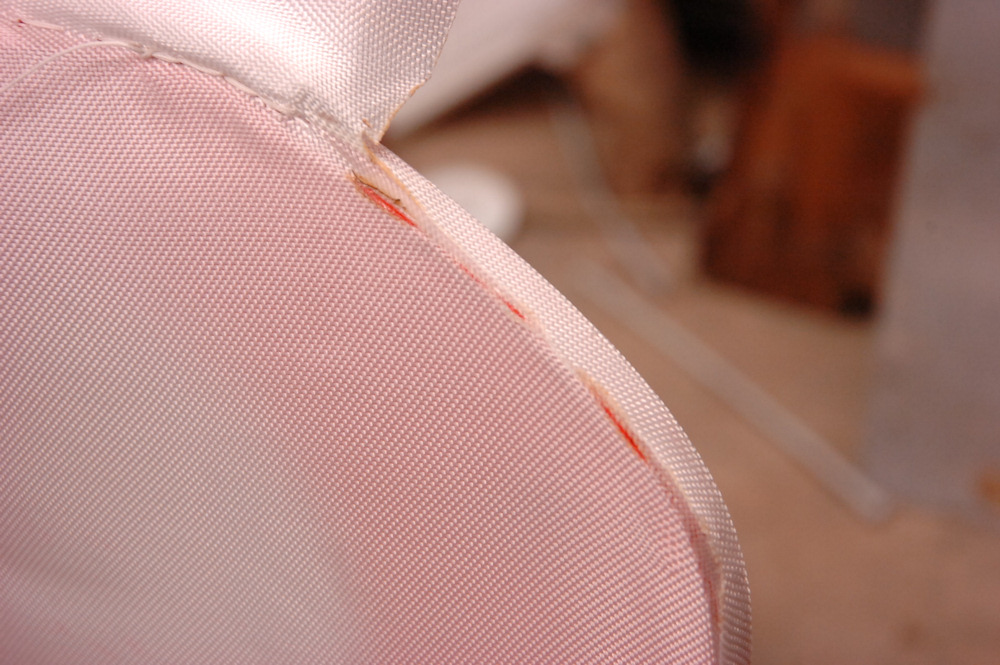
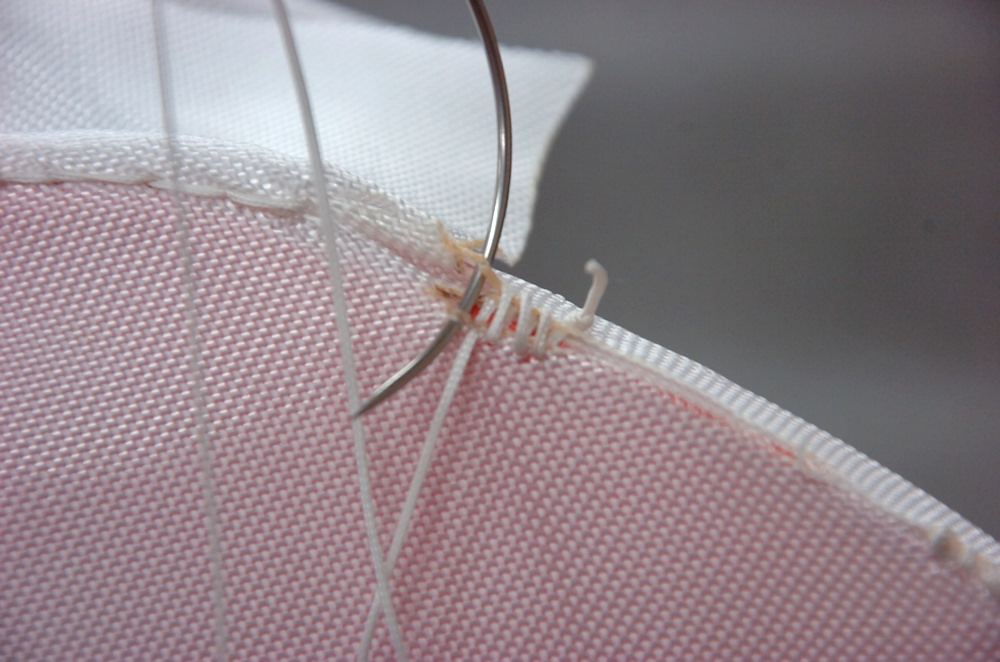
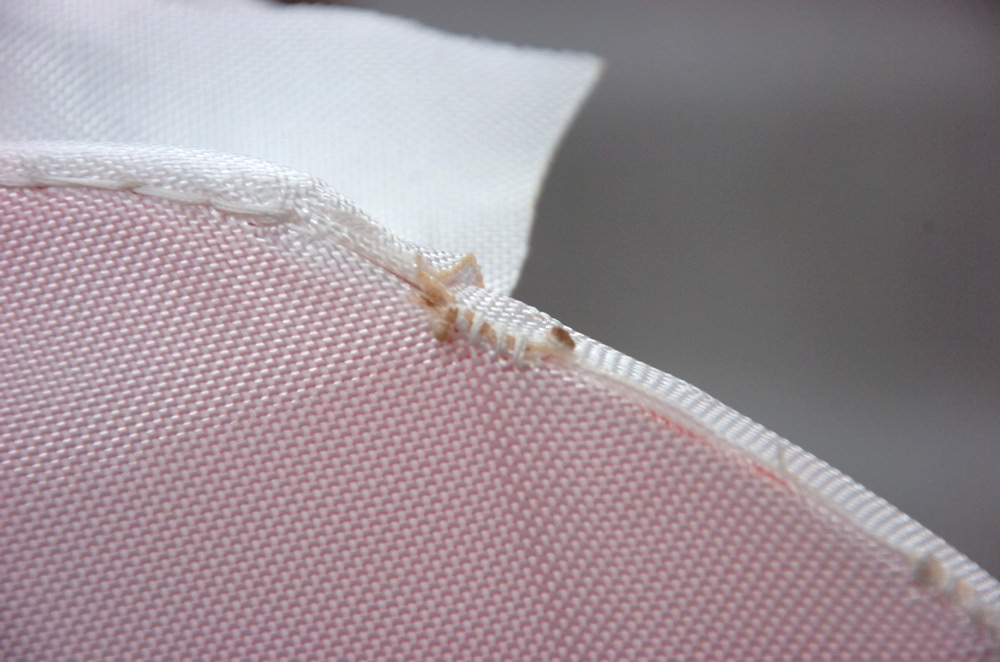
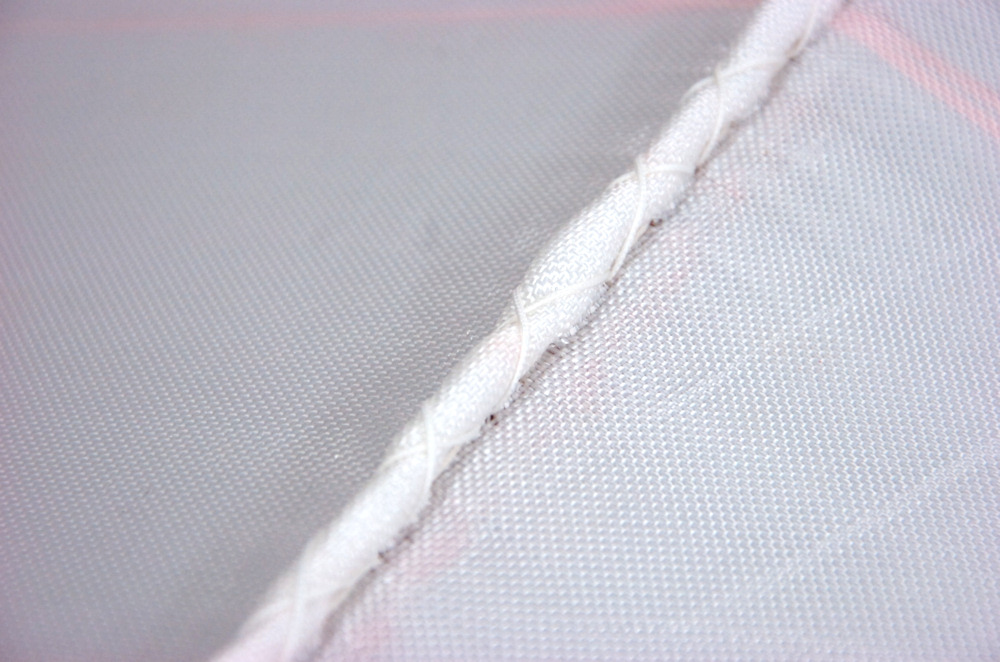
I wrapped the bow with stemband too. I let it run about  30″ down the bottom of the bow.  That should provide a lot of protection to the most abused part of the a skin boat. I never liked the stitching on very front of a Baidarka and that was a large part of my motivation to try this. Using the Heat-N-bond tape with the stem band turned out very well with only some very minor issues. This method would be perfect on a Stonefly or the Tangerine canoe and it would eliminate all the sewing on those two boats.

Now, I just need to tie up a couple of odds and ends and it will be finished. Once I get it on the water, probably next week, I will post launching photos and wrap this up. Thanks for following along!


Converting Long Shot * part seven

Lots of photos today and a good bit of progress too. I have started skinning the boat using the 8 oz polyester as I use on most of my boats.

I started sewing the skin around the boat, pulling it snug as I stitch. The one trick I learned when I skinned the first Firefly was to start at the cockpit and sew toward the bow. STOP, before you get to the bow and sew the Bifid bow first! Just trust me on this.

Sewing the Bifid is always tricky and my first attempt didn’t go to well. I had to remove a lot of my stitches and try again. Second time around looked much better. I ended up with a couple of puckered spots but I expected that and they will (should) pull tight once I shrink the skin.
jeffs-22

Another thing I am doing different is I am using Heat N Bond tape on the front of the bow to hold the skin in place. It is heat activated adhesive tape and you literally iron it on to the wood. Then peel off the paper backing, stretch the fabric tight and iron the fabric to bond it to the tap. I found it fairly easy to work with has a really good bond in one direction.

If I lift the fabric I can peel it off easy enough. But when pulling across the bonded area and not lifting it has a really good grip. So in this application it works really well. But it is not a permanent solution.

Once the boat is painted, I will be adding a bronze rub strip, screwed in place over it to finish it off. That will hide the exposed edges of the fabric and provide a very durable rub strip in the most damage prone area of the boat. And I think it will look better than stitching does.

jeffs-23

WOOPS! This is the stern and I used the tape there too. When I was trimming the excess fabric I stood on the wrong side of the boat and couldn’t see that I was hitting the corner with my hot knife and melting the fabric. If this were a clients boat I would have started over, but since it was mine I decided to repair it instead.

jeffs-24

Using a curved needle I ran several stitches close together though the fabric behind the melted edge.
jeffs-25

Once it is pulled tight and the thread trimmed close you can barely eve see it. After it is painted and the brass rub strip is in place, I think it will take a sharp eye to ever spot it.

jeffs-27

I did something a little different on the sewn seams this time. I usually just do a whip stitch and pull it tight. That makes it resemble 3 braid rope. This time I did 2 whip stitches from opposite sides and I only pulled the thread snug so that it did collapse the rolled fabric. This leaves me with a smooth bead down the center and it will give the boat a cleaner look.

jeffs-26

Here is the stern after I shrunk the fabric a little. If you remember I really struggled with the design for the stern and now I couldn’t be happier with this. It still looks traditional but it has a little flair and is not just squared off like many were. I never liked  the squared off corners but I love this!

jeffs-28

Check out those straight seams! Yea, I am bragging just a little bit.  I need to install the coaming and finish the seam around the Bifid bow, which I am not looking forward too! That is going to be hardest part of the sewing.

The white coaming is a first for me, I usually varnish them but this will has a ‘special’ paint job so I decided to paint it to match. And that’s the only hint you going to get on paint job.


Converting Long Shot * part six

This is a two for one post.. I am going to update you on the boat and do a quick review or first impressions if you will, of the Critter Sprayer.

I believe I mentioned previous that I read somewhere that all/most/some Baidarka frames were dyed red. No idea why and not sure if anyone knows. I would guess they used blood to stain them and it was for religious or superstitious reasons. I always thought it was a neat idea and red will contrast with the painted skin really well, so that is why I wanted to try it.

I asked on a wood working forum I frequent and the overwhelming consensus was to use Aniline dye. It will mix with a lot of different media and water was the one thing I had plenty of. So I heated some water, added the dye till it was dark blood-red and them put it in the fridge to cool.

I set up the frame outside and here you can see the end results. The new wood accepted the color much better and is much brighter. The old wood is darker and looks more like a blood-red color. Once it is skinned I think I the new wood will be much less obvious and it should all blend in just fine.

jeffs-19

Now, the Critter sprayer. Let me start by saying I am impressed over all. It worked well and clean up took 3, minutes TOPS! It take 30 minutes minimum, to clean my HVLP gun. That along is a huge selling feature.

jeffs-20

The only thing I didn’t like was the vent hole to allow air into the mason jar. It locate on top of the lid with no baffling. Trying to spray inside the boat and I would be holding the gun at odd angles and that allowed a dye to leak or slosh out. Of course I ended up with it on my hands. With something thicker than water I think it would be much less likely to leak out as easy. After realizing what happened I tried to keep the gun more level and didn’t have it happen again.

It has one spray pattern, a round(ish) smaller spray pattern and  you can’t adjust it. It’s much like spraying with a rattle can, just larger. It took me 3 or 4 attempts at adjusting the siphon nozzle height to get it spraying like I wanted. But that is quick and easy to do.

You find the Critter sprayer online for $40 or less. It looks like a toy but my first impressions say otherwise. It is much like an oversized air brush. I wouldn’t want to paint anything really large with it, but as easy as it is to clean…. it might be worth  the extra time it would take. I really hate cleaning a spray gun.


Converting Long Shot * part five

Today I was finally able to get back to work on Long Shot. First work got very busy and I was so tired that I just didn’t feel like working. I should have recognized that as a warning. I have been through this so many times!  I was coming down with a sinus infection and for almost 2 weeks  I barely felt like getting up and fixing something to eat, much less going to the shop to work.

As I mentioned, this boat was a prototype and the frame was very flexible.I have wanted to do something to stiffen the frame for a long time. I decided to try the Geodesic Boat method of using Kevlar roving wrapped around the frame. Platt’s boat frames were so extremely light he used the Kevlar to give them enough structural strength not to collapse. OK, I don’t know that they would have collapsed but I strongly suspect some of his designs would have failed without it.  He took light weight to the extreme!

This morning I started with the Heat n Bond tape and ironed it onto the frame along the gunwale and the keel. I tied off the Kevlar to the frame and started wrapping it around the boat and then clamped the end to the frame. Starting at the front I pulled the Kevlar tight working toward the cockpit. Once the roving was tight all the way down the boat I secured the end.

jeffs-14

Using my heat gun to warm the tape where the Kevlar crossed I took a dowel with the end rounded over and pushed it into the tape to ensure a good bond.  Latter I found out that it was easier and quicker to just use the iron with some of the paper backing between the iron and roving. This kept glue from getting on the iron.

After giving the tape time to cool, I removed the clamp and was impressed with how well the tape held the Kevlar. I could lift it up without a lot of effort, but in tension the grip was strong that this where the stress is.

jeffs-15

I started on the bow wrapping the roving around the boat.  I now realize I was spacing it way to close together. On the rear of the boat I used a much bigger spacing and it is just as stiff and it was much faster to apply. And it looks much better.

jeffs-17

I kept testing the frame by flexing it and at first I was disappointed. There just didn’t seem to much improvement. But once I got everything in place I could tell that the frame was much stiffer than before. Not stiff like a plastic boat but miles ahead of where it was. 
jeffs-16
When I put the skin on I am going to pull it tight and bond it to the tape with the iron before sewing. Once the skin is shrunk I am very confident that this boat will be at least as stiff as the rest of my designs and I will be a bit surprises if it is not stiffer. Either way it will much improved over what it was.


Converting Long Shot * part four

I finished the bow and started lashing all the joints I had left loose. For some reason the stringer slot in this frame is deeper on the new design than on this one. If I lashed the joint it would pull the stringer out of line. If I had some wedge shape cutoffs from cutting scarfs lying around I could shim the slot to fit. But since I didn’t and they are lashed to the near by frame I decided to just leave like this.

jeffs-10

While I am lashing I look down and realize I am being watched. Then I realize ‘I’ am not being watched, it’s the lashing that she is watching. She could care less about me, see the dangling sinew? She does.
jeffs-11

I turn my back to cut another length of sinew and I hear wood banging around. I turn around to find Grace inspecting my lashing and knocking the floor stringers out of the boat. All this time she has shown no interest in the boat. Now she won’t stay away. jeffs-12

Despite all of Grace’s help I did manage to finish the frame. It is ready for to be oiled and skinned. Except I have some slightly different plans. I am going to order some red dye to color the frame. Then I will apply the oil finish over the dye.

Somewhere I read that many/most/all Baidarka frames were red. So, I am going to dye it red. I have always like the idea of the frame being a contrasting color but I have just never followed through on the idea. Maybe a black frame with a white skinned boat? Or a red frame with a ……. no,  you will have to wait to see what I have in mind for the paint job. It’s a surprise.
jeffs-13I am going to try to do something to stiffen the frame too. As I have said, this frame was the prototype Long Shot and I made changes to the final design. One thing I was not happy with is that this frame has always been too flexible  All Fuselage frames flex some, but this one was very flexible.

I have never said much publicly about this because the frame was redesigned before the plans were released. Since I know how rumors get started and people twist what you say, I just kept that to myself.

Since it is apart, I want to try reinforcing this frame with Kevlar roving similar to what Plat did on his Geodesic boats and see if that will not stiffen it. If it works I could see it having applications on a fuselage frame race boat.

If you are serious into racing you do not want any flex in the boats hull. While it is probably slight, the energy spent flexing the boat is energy not moving the boat forward. Probably very minimal but races are often won by very small amounts.

I have to order supplies so it will be next week before I can do much else on the frame. So mean time I am going to try to get some work done on the Sea Skiff.


Converting Long Shot * part three

Just a quick post. I spent a lot of time working on the bow but there is not a lot so see. I wanted more than just the flat bow stem. I wanted to add some shape to it so it didn’t just look like a piece of covered plywood.

bow fitting

My first step was fitting the bow in place.  Clamped  in place I decided how I wanted to install it and the details of how I was going to do this. Once everything was trimmed and fitted it was time to move to the bench.

Since I am not working with a big block of wood I need to add stock. I started with a lot of scraps of cedar on my bench. Left over pieces of stringer, cutoff of’s from paddles, etc. I tossed around a lot of ideas trying to decide how best to get the look I wanted. After a lot of different ideas I decided using plywood  was the simplest way. It is heavier but it is also stronger and simple to glue in place since it has smooth faces it ready to glue in place.

jeffs-9

Tracing the outline of the bow on the scrap plywood, I cut the pieces on the bandsaw.

Holding them in place I stretch an old piece of t-shirt over the bow, this shows me how it will look once skinned. It also shows me where the skin will touch and where it doesn’t and how it transitions from one section to another.

I have to do a lot of trimming and shaping with the rasp to get the proper look and keep from  having a boat full of bumps and flaws.  It’s a slow process but if you don’t it’s very obvious and very ugly to my eye.

Once I was happy with the look, I applied the glue, clamped everything in place and called it night. This afternoon I still have a little fitting to do but I expect to finish the fitting the bow and start lashing it all in place.

Converting Long Shot part two

I now have the frames cut out and wrestled into place on the boat. They are not that hard to replace but they sure don’t fall into place either. It took some gentle persuading with a wood mallet to convince them to go back in place. But once you get them close they just fall into place. I have started lashing but I just did enough joints to lock them in place.

Here is the bow sort of in place. I wanted to see what I had and what I needed to do to fit it in place. I want to build up the bow by gluing on some wood and then shaping it to get the proper look. This is going to take some time to get it shaped exactly like I want.

The stern I am extremely happy with. I have been through a lot of ideas before I finally settled on this one. I wanted something fairly traditional but at the same time I didn’t just want to copy what has always been done. I took ideas from two or three different boats and this is what I settled on. I really like the way it looks. It’s look better than it did on the drawings.

Converting a Long Shot

My Long Shot has been a test bed for new ideas and has been heavily used. I have modified and reskinned it at least twice. No idea how many miles I have paddled it but I know it has been a lot!

This was the first Long Shot, the prototype boat and it has some issues that were addressed in the final version. While you guys paddle the new improved version I have been paddling a flawed version. So when I recently noticed a couple of problems starting to develop I started to think about the possibility of ‘upfrading’ my Long Shot. One idea has lead to another and then another.

I have always wanted a Baidarka and the more I looked at the plans, I started to realize  that I could rebuild this one as a Baidarka and finally have the one boat I have always wanted.

I have a design drawn, but I know that the plans don’t match the prototype. They are close but there are changes that have been made. So that is going to mean I can use the plans as a guide but I will have to fit the replacement pieces to boat.

Last time I paddled Long Shot it developed a leak. I kept thinking there was a lot more water in the boat than normal. I pumped it out and before long the water was back. Rather than try to patch it I decided it was time to rebuild it  (again). So, today I started by stripping it down the bare frame to see what I had.

The frame looked just as I expected. It was in good shape with only one big surprise. One of the reasons for the reskin was I was seeing some flexing in the frame at the front of the coaming so I knew the frame was going to need to be replaced at some point. When I got skin off I was VERY surprised to see this.

Even though the frame was in two pieces,  the skin and the lashing were holding together quite well so and there was no way to see it was actually broken in two pieces  There was no danger because the skin wouldn’t allow it come part. I think that speaks to the toughness of these boats.

What happened, why did it break? I don’t know but when I strap it the rack on my car, the straps fall right on top of this frame. On my trailer the straps are further toward the ends.Another thins is the frame was very thin under the deck stringer. It’s possible the plywood was weak. I quit using this ply right after this boat was built because I was getting worse every time I bought it.

The frame design was one of the things I changed. The new ones are beefier and much stronger, especially if you use Baltic Birch plywood. This was my prototype and as I said, I this was one of several changes that were made.

Oh yea, I found one other surprise inside the boat. There was the usual dirt, bugs and misc. trash that get trapped in the ends. But this one I was not expecting! Creates some scary thoughts too!


We have lift off

The boat lifted off the trailer that is. In my last post I mentioned it took me a full day to lift the boat off the trailer just an inch or so, I knew I had to have a better way. After much contemplation and racking of the brain, I finally settled on pair of gantries.

While this was a great idea, it turned out it was going to cost a fortune!! I needed 4 hoists and 8 industrial casters and neither of these are cheap. Plus I needed lumber too.

I priced chain hosts first. At least $125 each and I need 4. Casters are at least $40 plus and I need 8 of those. That is $820 plus and that doesn’t count shipping. That could buy a lot of mahogany!

Well, never doubt the power of prayer. I found all the above for a little over $300 and scrounging around my barn I found all but 2 pieces of lumber for the 2 gantry frames. All I can do is say Thank you Lord!

I pulled the boat out of the shop late in the evening to make room to build the gantries. The next morning I started to gather all the parts and lay them out in the shop. The Weatherman was calling for a nice day but storms that night so I had to get these built today and the boat back inside. I knew that once I got started it wouldn’t take that long. But handling all those heavy pieces made for one LONG day.

I added another item to my “I will never do that again” list. Trying to stand up a gantry by myself. While I did it, it took more than one attempt and there was some collateral damage the first attempt. But we are not going to talk about that.

If you look close you can see the second gantry is built and upright minus the wheels. The second one, with wheels installed is standing upright too. Wheels can turn a simple one man job into a bloody nightmare! But being the kind of person to learn from his mistakes, I laid the second gantry down, finished assembling it and waited till help showed up before I tried to stand it up. Of course the fact I was teetering on the edge of exhaustion probably had something to do with that choice too. But about 7 pm it was done and boat was safely back in the shop.

Jumping ahead a couple of days my new strap, not straps, came in. Being the patient person I did take the time to read the invoice and find out why I only had one strap when I had order two. It seems they only had one in stock in Atlanta and the other one was coming from the warehouse somewhere up North in Yankee land. With my luck, it will take a week to clear customs at the Mason-Dixon line.

I wanted to see what happened to the gantries when I put a load on them. I hung two chain hoists, pulled the strap under the boat and tried to lift the back of the boat.

Exciting photos huh? Even though you can’t see it, the boat is just clear of the bunks on the trailer and I can see day light between them. Lifting the boat was almost effortless. I measured the gantry to see if was trying do the splits but found it had just barely moved.

One thing I see I need to change is the braces at the top. Now that I see everything in place I see a better way to brace it. I can give the hoists more clearance and spread the load out more.

While I wait on the second strap I am going to leave it hanging on the hoists. I will measure it before and after I take the load off the boat and see what if anything moves. Assuming no surprises, it won’t be long before I can start getting serious about tearing it apart.