Building Short Shot – part 1

Recently I had a discussion with a client in the forum about the cost of building a boat. His values seemed high to me and I realized he was counting some things other than just his materials. In the course of the discussion I realized that prices have raised enough that my low end figure of $300 was probably not realist for most people. Thinking about costs I started wondered what a ‘well equipped’ kayak, like I typical build for myself costs?

I just started a building a redesigned Short Shot, for my wife, so I have decided to keep track of the time and costs of building this boat and document the building process too. I have a lot of spares and scraps lying around I can use that cost nothing. So, I decided to keep track of two costs, actual costs and what it would have cost me if I had to buy it.

For example I managed to cut all the frames from scraps lying around the shop I have been saving. If you have to go buy it, a sheet of plywood is about $50 in most places so I will use that figure. Stringers, I had the wood in the shop and just pulled it from the rack. It is hard to find so I whenever I see good wood, I buy it. I will have to call the lumber yard and get a price for what the wood costs is.

As you can see from the photos, I have the frames made, the stringers cut and scarfed and glued. At this point I have 11 hours (rounded) in it. I didn’t keep track of my time cutting the frames since I did those a couple of weeks ago but because I cut so many I have gotten really quick at it. To be realistic I used 8 hours for the frames. That is about what it took me when I started. Then 2 ¾ hours to cut the stringers, cut the scarfs, glue them and set up the strong back.
Once the glue dries I can start actually building the frame.

Clamshell strong back

Clamshell strong back

Cutting the scarf joints on my table saw with my scarfing jig.

Cutting the scarf joints on my table saw with my scarfing jig.

IMGP1336

Jigsaw puzzle, ready to be glued up into something useful.

Jigsaw puzzle, ready to be glued up into something useful.

My favorite clamps for this job is PVC pipe.

My favorite clamps for this job is PVC pipe.

Waiting on the glue to dry.

Waiting on the glue to dry.


3 boats, 6 days.

Last of of August I was invited to the Chincoteague Bay Field Station, in  Wallop Island, VA to teach a Road Scholar class where each student builds a Fuselage Frame kayak for themselves.

Being a Road Scholar program the staff has also scheduled in field trips such as kayaking, exploring a private beach and educational classes. They also take everyone out to a few local Restaurants. All of which are very good, especially if you like sea food!

The facilities at the Field Station are top notch as is the the staff. As one student said, they over serve you! If you ask for a pencil you will get a handful of them with a sharpener and a smile. The Educators that work with the classes are college grads and most have studied Marine Science or related fields. They are all obviously the cream of the crop and you will not meet one that doesn’t impress you.  The ladies in the cafeteria always provide excellent meals and plan them well. I was last in line one morning and it looked as if they had run out of food. When I got up to the steam table I realized that actually there was just enough for a couple more people. They plan so well that there is just very little waste. It shouldn’t have surprised me because that is just typical of the way everything is done here.

Sunday afternoon the students arrive and check in. I had arrived a day early and prepared my class room ahead of time. I had the strong backs set up, all the tools, frames, stringers, etc. sorted out and arranged at each work station.  It didn’t take long to have the class room in shape so I was free to enjoy a couple of days of paddling.

Sunday night I meet with my students, Parker does the introductions and goes over all the formalities and instructions for the coming week. Then my favorite part, The Boil! These folks start the class right, with meal fit for king! After the meal we visit the class room and show them what they have gotten into. I give everyone a homework project too.the boilMonday morning we meet in the cafeteria and have breakfast together and get to know each other a bit better. This year we were building 3 kayaks, two of my Vardo design and a one Ravenswood.  Once in the classroom I get everyone assigned to their stations. I cover some basics about building, teach them the names of the parts of the boat and I try to get them ‘hands on’ as quickly as possible.

This is where we stopped at lunch, it doesn’t appear we have much done but it is actually a good start. They have a few frames in place and have started to lash them in place.2014 class -1 2014 class -2 2014 class -4It takes the students till the 3rd day to get the lashing to the point where we can take the boat off the strongback. However, these guys were here for one reason, to build a boat! The schedule is flexible and they decided to skip the extracurricular activities to stay in class and work. They even came back after dinner and worked when it wasn’t scheduled.  By the end of the second day they had their frame to the point it had to come out of the strongback.2014 class -8 2014 class -6 2014 class -7We pulled off the frames, lashed the joints you couldn’t get to and then it is time to apply a finish to the frame. Because of the time limitations we use water based poly because it will dry quickly. Since we were a day ahead Wallis and Jim wanted to stain their frame as well as the coaming.

By the forth day, they were all starting to get a little tired from the pace they had been keeping. They decided to take some time off. So, the next couple of days we did some kayaking and went beach combing on Wallops Island, which is a Military base. It is used by the Navy and NASA has a launch facility there. The Field Station works with NASA and is the only group  that gets access to the beach other than those that work or are stationed there. beach beach2The beach was littered with Horse Shoe crabs. I discovered that this is Mecca for Horseshoe crabs!

beach3Tara, one of my educators found this little guy on the beach. I managed to catch him and calm him down. For such a little fellow he was seriously wanting to eat me! I thought it must be a Rat Snake but it turned out to be a type of Garter Snake I had never seen. My other educator Gabe, who was off that morning, was involved with an ongoing snake research project on the Island and told me they were a rare site on the Island. After a few photos, we turned him loose.

With the frame finished they started skinning the boats. I decided to try the Double Corded Stitch for the first time in a class and that was a good choice. It probably cuts the sewing time in half. I was also impressed with how straight their seams were for first timers too. They didn’t realize just how well they were doing though but I was impressed.2014 class -11 2014 class -10 2014 class -9Saturday arrives and it is the last big step, painting. I always look forward to seeing what color everyone picks. I had heard lots of ideas tossed around during the week, but when it comes down to the wire you never know what they will go with.  Don seemed to go the safe route with white, but he had some big ideas for paint once he got home. So he just wanted to white base coat and has promised to send me photos of the finished product. Wallis and Jim…. well, they went bright!

2014 class -132014 class -14 2014 class -12Sunday morning, 50 +/- hours latter we have 3 boats 99% finished. These guys have been hard workers and now it is time for their reward. We work on installing the backbands and painters. Finished any last minute details and it’s time to load up the boats and launch!

Don lived close by and decided to pass on the launching and so not soil the paint since he wanted to do some custom work on it.. He loaded up and said his good byes. And yes, that is a sweet little CJ!

dons ravenswoodGabe and Tara, my most excellent assistants for the week, loaded up the boats on their trailer and we headed the NASA docks to launch.

2014 class -15

launching The smiles on their faces said it all! My camera had started acting up and I didn’t get to take any photos of us outside the harbor. I would have used my phone but there was at least 20 mph winds blowing and I wanted both hands on the paddle! That is a tough maiden voyage but it went very well and the boats looked great on the water.  We paddled around for about an hour and I think no one was any happier than me! I love seeing those smiling faces in their new boats, that they built!

New design

I have been playing with a lot of ideas and designs for while now. I have a pretty good line up of boats but there has always been one missing element.

Long Shot and Short Shot are, and I hesitate to use this word, ‘fast” boats. That is their rounded shaped hulls have lower resistance and are easier to paddle, but their styling it not everyones cup of tea. For a long time I have thought about how to fix that and I think I have it.

It’s not a done deal but I have a strong feeling this is my next design. Greenland like styling combined with a more efficient multi-chinned hull. This image is the first draft but I am excited about this one!

LS-greenland-ish2_Linesplan

I’m back! (finally)

I am finally back to work on the Chris Craft. I must admit this phase of the project has really intimidated me and I every time I come down and start working on it, I ended up staring at it, wondering how am I going to fix that bottom?

The answer was just muster up some courage and dive in. So that is what I have one the last couple of days. I started by installing some bracing to assure the boat holds it’s shape as I tear it apart.

bracing 

With the bracing in place it was time to crawl underneath and try to come up with a plan. I could quickly see I was going to be spending a lot of time underneath.

bracing-3 

I have found that an air powered angle grinder with a paint/rust removal pad is a good choice for the task at hand. It will quickly remove paint, filler and wood! And there is a lot of all three to remove.

bracing-2

And here is a photo of the first (of many) screws coming out.

first screw I am still intimidated by this project. Still not sure what to do but at the same time I am excited to be back at work on it.


Stonefly’s everywhere!

It’s been a while since I have written anything. but I promised myself and my readers, never to just post without decent content.  I think you will find it was worth the wait!

I got a message from ‘Canoez’ on the Wooden Boat forum bringing my attention to a posting he made. I have have seen him around the forums but I only know him by his handle, Canoez. Seems ‘Mr Canoez’ works at a school and teaches boat building. I have asked for his name and where the classes are so I can give proper credit but as I write this, his identity and the location of his class room remain a mystery. Hopefully Mr. Canoez will respond so I can give him and his students proper credit. They deserve it!

The story is that the 8 students were offered a choice of 3 boats they could build. 7 of the 8 chose to build my Stonefly canoe from my book Fuselage Frame Boats. While I was flattered that so many choose my canoe,  what these students did with my design is… well you have to see it.

BTW, most of the captions with the photos are Canoez comments.

I have always said that there was potential to make Stonefly into a stunning boat. When I built the prototype I choose the easiest way so that most anyone could build one and I always like the way it looked. But what these guys did is beyond what I thought could be done!

I understand there were other boats that were just not ready to be displayed for various reasons. Really anxious to see the rest of this fleet!


Half a Curlew

Wanted to share a fun little project I am working on. Have you ever seen those cutaway machines where you could see inside and see how it worked? I have a very vivid memory from my childhood of a washing machine, or maybe it was a dishwasher that had plastic panels where you could see inside as it operated. It make an strong impression on me that I have never forgotten!

I was looking at a frame I had thrown together a few years back for a woodworking show display. Short cut were taken so it wasn’t suitable for anything other than display use and has been hanging from the shop ceiling for a long time. For some reason when I looked at it this time I had the thought of making a cutaway model from it.

I am going to Chattanooga TN this weekend for the Outdoor Gear Swap and I am getting this ready to display there. I am going to partially skin the boat, partially shrink the skin and partially paint the shrunken skin. Showing the different stages of construction and how one of my boats are built.  It’s not the same as watching a sewing machine gears operate or a dishwasher slinging water, but I think it will be pretty cool. I will post some more photos once it is finished.

IMGP6956 IMGP6951 IMGP6952 IMGP6953 IMGP6955

SoLo

My truck had 330,000+ miles on it and I really needed to replace it.I was determined to pay cash so price was a big issue.  I was driving a pickup but it didn’t fit my needs that well and they are very expensive here.

A Suburban seemed a better choice, large roof line for kayaks, towing capability, the are plentiful and much cheaper than a pickup. Plus they’re easy to customize since they share a lot of parts with the pickups and I wanted something different this time. Not just  a run of the mill vehicle.

I had been looking for about two years. One day I was praying, or really just talking (whining) to God about finding the right vehicle when I hear this small voice say, “Wait till you see what I give you!”  Needless to say that caught me by surprise!

solo-2

Not long after I found a beautiful customized red Suburban on Craigslist. The ad sounded too good to be true. The price was more than what I had saved but it looked perfect and thought this was the one! But then the same small voice said, ‘No.’ Hard as it was I didn’t respond to the ad.

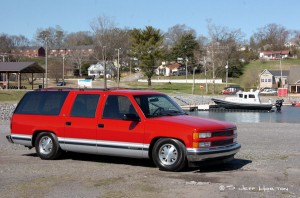
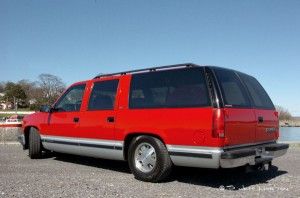
Later on an older Suburban came up for sale. It was lowered, mechanically new, newer paint and nice wheels and tires. If I had built one this is very much like what I would have built. I talked to the owner and we arranged to meet.

I spotted it coming down the highway and it looked awesome! But, when I stepped out of my car I knew I didn’t want it. It was everything he said it was and it rode and drove excellent. I just knew it wasn’t ‘the one’ I had been promised.

Back to Craigslist and the Red Suburban is still there. I tried to ignore it but it just kept being re-listed. I decided to email him a question and if I didn’t get a positive response  I would take it as confirmation to the ‘no’ I thought I heard. After all, I might be wrong.  But my answer was clear, no response! Not convinced a week later I sent another email and still nothing. OK, that is a pretty obvious answer.

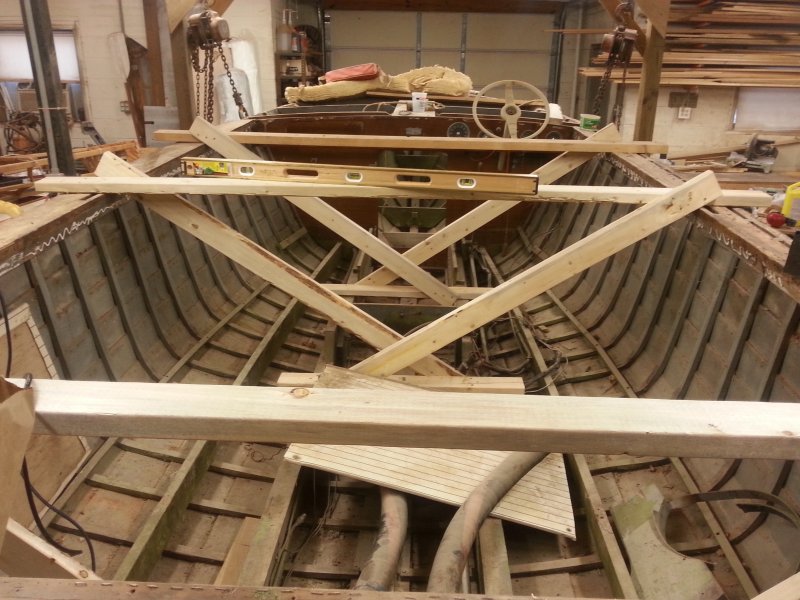
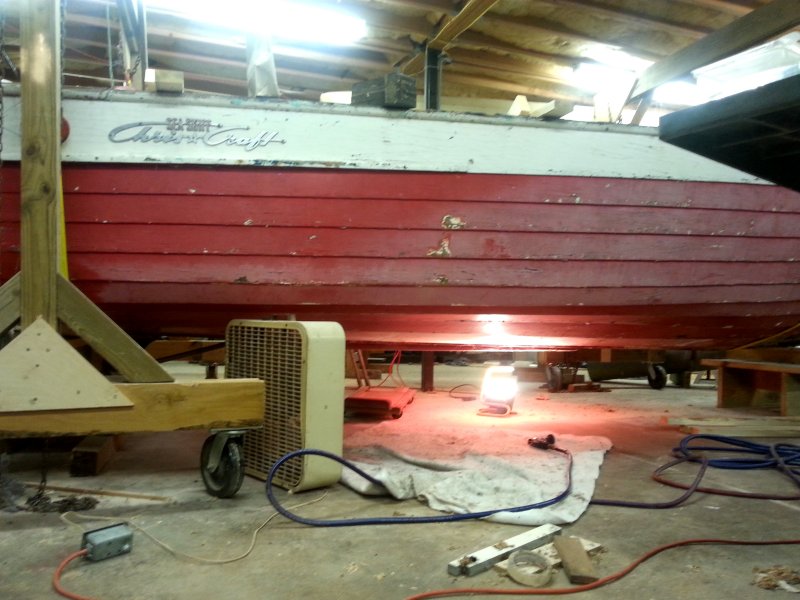
More looking and still nothing, I wouldn’t mind doing the work myself but my shop space is tied up with the Chris Craft so I really needed to find one with the major work done. But, I had only seen two modified Suburbans that I would consider. That kept nagging at me and the red Suburban just kept showing up. Finally, I HAD to go see it! If I didn’t I would always wonder what I missed.

I contacted the owner and he seemed up front. He had a financial issue and needed to raise money quickly. He gave me his no haggle, bottom dollar price and it was exactly what I had saved. Instead of being excited, it scared me. I had been hearing ‘No’ every time I prayed about this vehicle and I didn’t want to be mislead and buy someone else’s problems!

My wife and I made the two-hour drive.  One thing you need to know about my wife is she is very conservative and never impulsive! While we don’t always agree I have learned to listen to her feelings. When she tells me something doesn’t feel right, I listen and today I wanted all the input I could get!

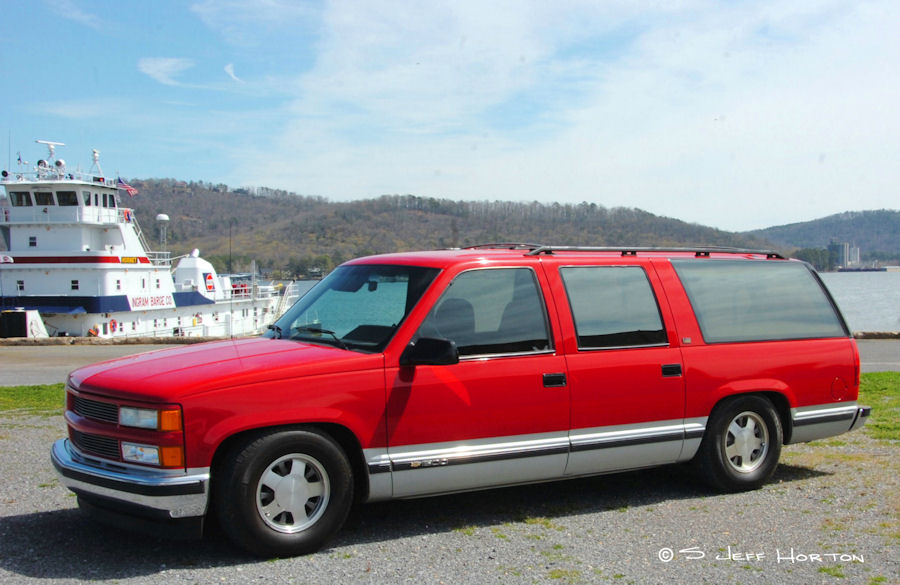
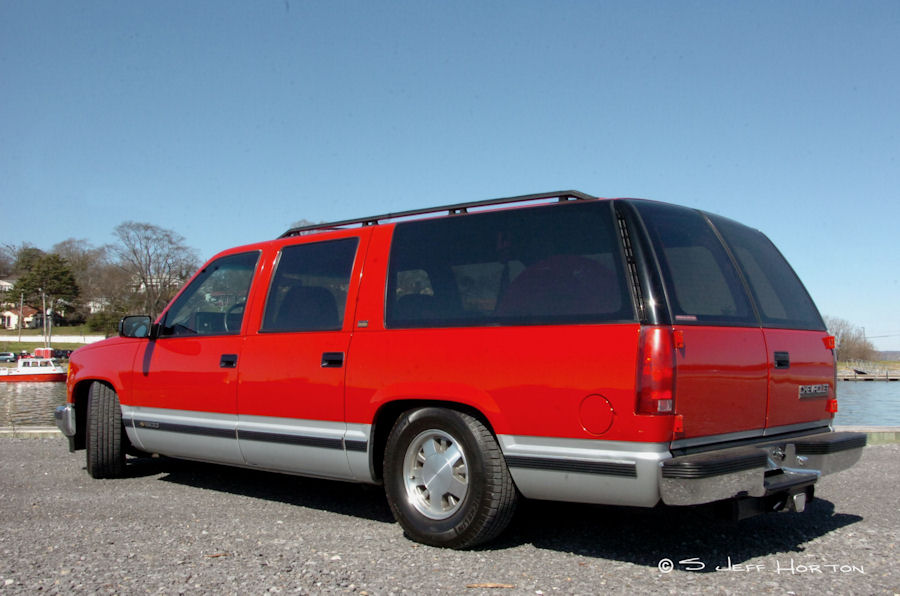
As we drove up we spotted the Suburban sitting in his yard. As we got closer we were both surprised, it looked almost new and it was 20 years old. As we pulled in the driveway she said, “If you don’t buy this one, you are an idiot!”  That is totally out of character for my wife!!

solo-1

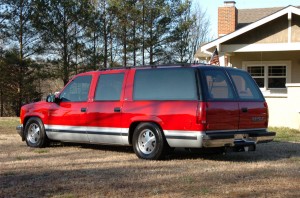
The Suburban was everything he said it was. My wife told me if I didn’t want it she would take it! I was amazed no one had bought it and I guess I should have bought it on the spot. But I knew if it was mine, it would be there for one more day.

We drove home and prayed about it. I kept thinking about all the ‘no’s’ I heard. Weighing that against “Wait till you see what I give you.”  This vehicle fit the later perfectly. But why has it not sold?

My wife said “This is the vehicle you were promised. You just had to wait till he lowered the price so you could buy it.” So, the next day I bought SoLo.

I started cleaning my truck and another car I had bought to resell but had been driving. It took me a couple of days to get them ready. Once I was finished, I parked them in the yard, but I never expected to sell them that way. I live in a rural area and not very many people would see them. So that night I posted ads on Craigslist.

I came home the next day at lunch to find a note from a neighbor saying “Consider the truck sold!” I was floored!

I had tried to sell the car before but only had one phone call and no lookers so I had been driving it. I was a little concerned about how fast it would sell but if this was God I knew it would sell, but I didn’t expect it would sell quickly. The next day a neighbor stopped and said he was interested but I didn’t think much of it. He brought me a check three days later.

Amazing! Both vehicles sold in less than a week and both brought more than I had expected. Enough that I was able to replace the money I had saved and still have enough left over to do the one thing that had not been done to SoLo, installing a good stereo.

Looking back I am still amazed at how everything worked out perfectly. The only hard part was waiting on God. I could have bought something a long time ago but I kept waiting on the right vehicle. When the time was right, it all worked out perfectly and quickly and left no doubt this was my promised vehicle.

solo-2 solo-3

solo-4


The BIG UNVEILING!

I did not plan on posting again till it was ready to go to the water, but I hit a little snag and decided to go ahead. I think I am at about 98% finished I just have a few details to take care of and I don’t think I will finish today. I hit my head yesterday and I still have a bit of dull  headache, so I am taking it easy and not pushing to get done.  I decided to go ahead with the ‘Big Reveal’ today anyway.

Click on the images to see them full size.

jeffs-32 jeffs-33

Like it or not, I love the paint job. I have been thinking of this since I did ‘Nemo’, the orange and white Curlew. I played around with colors when I painted Nemo and Nemo was almost painted these colors!

But I wanted to surprise John Redmond who gave me the idea.  John had posted a photo of a Clown fish and said ‘Jeff, why don’t you paint one like this?” Had it not been for that I would have used these colors.

jeffs-34

I used toggles and polyester rope instead of bungee. Toggles have the advantage of being able to  slide your paddle under them, spread the toggles apart and they will tighten, wedging your paddle across the boat. With the blade in the water it makes a big difference in the stability of the boat. It dampens the boats movements so it doesn’t roll nearly as fast on you. It is great for wet entries and much faster to deploy than a paddle float since there is nothing to find nor inflate. I put them front and back on this boat since the rear ones would get in the way during a cowboy scramble style of reentry.

jeffs-35

I put a singe white bungee right in front of the cockpit so I have a place to put gloves or a hat or something small and I don’t have to fiddle with tightening the toggles. Since I rarely carry anything other than a spare paddle on the deck the  single bungee is perfect for my needs.

jeffs-36

I am well pleased the way the stern turned out.  I wrapped it with a brass stemband using  #4 bronze screws to anchor it in place. There is a bead of caulking underneath it to bed it and seal the screw holes.

jeffs-37The bow is my favorite part of the boat. I have always wondered if the Bifid bow wasn’t inspired by the mouth of something the Inuits hunted. Maybe a way to pay tribute to the animal or animals.This style of Bifid always made me think of the Salmons appearance once it changes during the breeding run up the rivers. That is a large part of why I wanted eyes on this boat.

I am not quite finished painting the eye. I need to add some white highlights to it but the black was still wet when I took this photo. It will be tomorrow before it’s dry enough to paint those.

I wrapped the bow with stemband too. I let it run about  30″ down the bottom of the bow.  That should provide a lot of protection to the most abused part of the a skin boat. I never liked the stitching on very front of a Baidarka and that was a large part of my motivation to try this. Using the Heat-N-bond tape with the stem band turned out very well with only some very minor issues. This method would be perfect on a Stonefly or the Tangerine canoe and it would eliminate all the sewing on those two boats.

Now, I just need to tie up a couple of odds and ends and it will be finished. Once I get it on the water, probably next week, I will post launching photos and wrap this up. Thanks for following along!


Converting Long Shot * part eight

I got a little behind while I was sick but know now I feel I am making good progress. The (unnamed) boat is now skinned and the base coat is on. At this point it could go to the water actually. But I am not done. I want to work on the rigging and get my holes in place and the lines installed temporarily.

Once I have everything located I am going to remove it and layout the paint the rest of the boat.  These are probably the last photos till I finish it. Traditionalist beware……..

jeffs-31 jeffs-30