| Ā | Ā
PM-100 Powermatic Planner Restoration
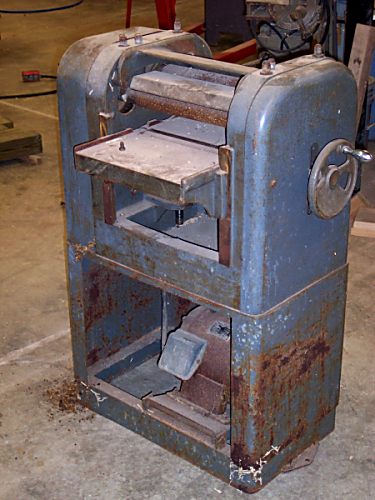
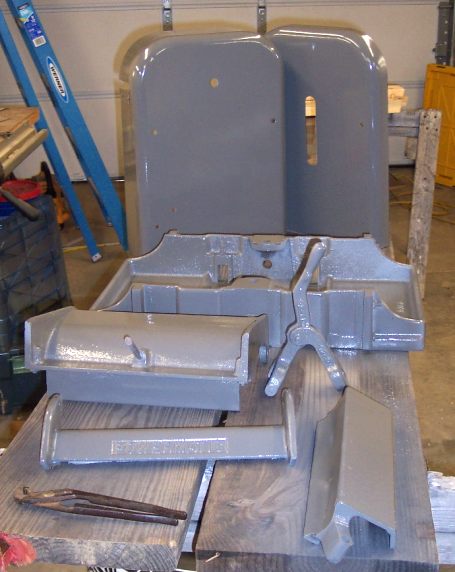
This is my third old machine restoration project. It is a Powermatic 12" planner built between 1950 and 1955. I wish I could narrow down the year better but so far that the best I have found. It was a sad looking machine when I got it. It was the only machine that didn't run of the bunch. Judging by the others I had no reason to assume this one was not taken care of. It was just stored for a long time and allowed to get to looking pretty sad. 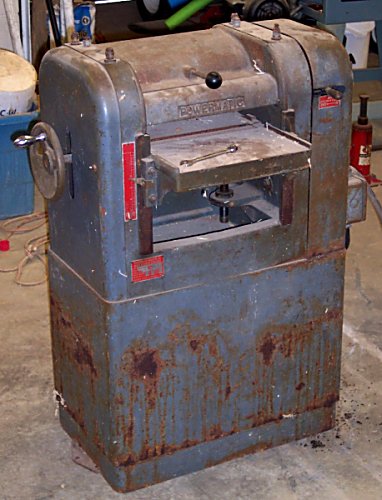
As with any restoration the first step is a complete tear down. When you get to the point there is nothing left to take apart you must be done. Well, don't take that to literal. In this case I think everything came apart though. 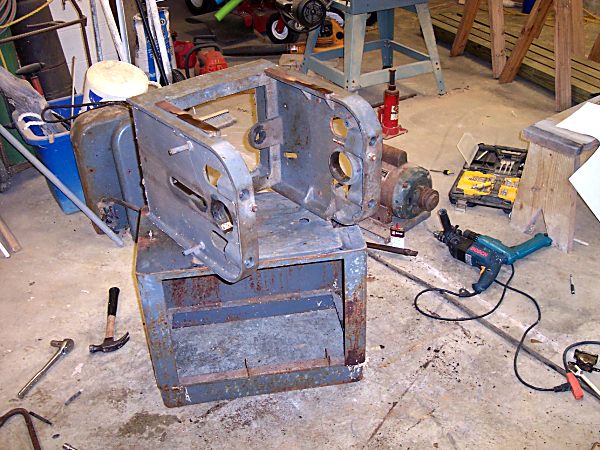 Once it was in pieces the fun starts. Because there are so many moving parts in a planer it means they have to be lubricated to keep them from being damaged. There is six of seven zirc (grease) fitting on this machine. That meant there was a fair amount of grease too. And we all know that sawdust is attracted to grease. So lots of cleaning to be done. Fortunately the planer was never repainted and the original paint was in decent shape. Except for the lower part of the stand of course. The stand had to be stripped but the rest of it was mostly just cleaning and some hand sanding and painting. The machine was originally a dark gray color. I am a big fan of Valspar tractor paints sold at Tractor Supply. This is one tough paint but it is limited to tractor colors. Fortunately Massey Furgeson gray is a good match. 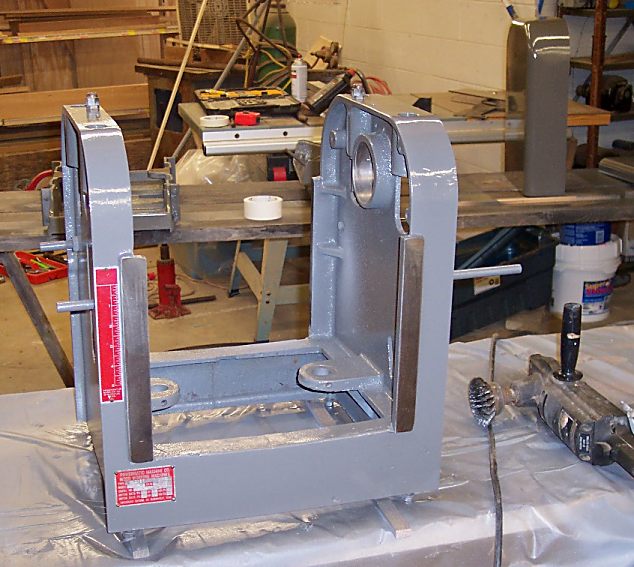
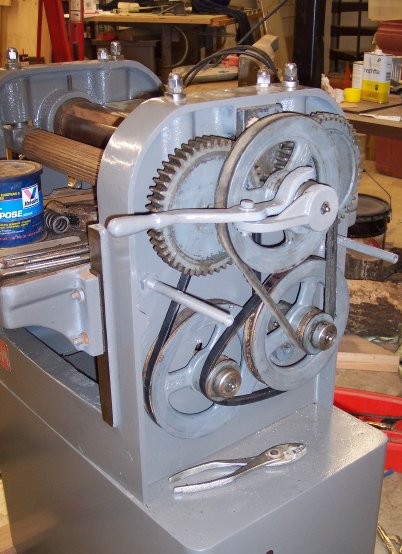
 I had to replace a couple of pulleys that were damaged when trying to disassemble it. The motor had to go the motor shop for a rebuild and the switch needed to be replaced. Thanks to a members tip at Old Wood Working Machines forum I found a replacement switch that is a near perfect match for the original. I had looked several times in different places but had not found an appropriate looking switch. The rest of the pieces were easy to find. It was time to start putting it all back together. Reassembling the planer was straight forward and no real problems. 
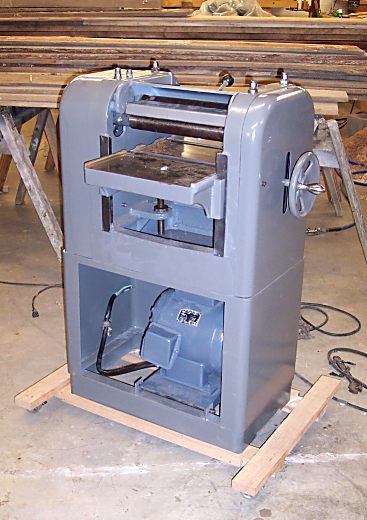
 Once the planer was together I still needed to sharpen the blades before I could finish it. The guy that does mine is out in the middle of nowhere and only does it at nights and weekends. So that means two trips. I decided to just order a new set so I would have a spare. Adjusting the planer was a larger job than I expected. I found this video on setting up a planer to be invaluable! If you have to set up a jointer or planer you need to download and watch this. It took me 3 hours or more to adjust everything on the planner. Of course I had some problems that I had to correct that added to the set up time. But finally it was together and ready for a test cut. 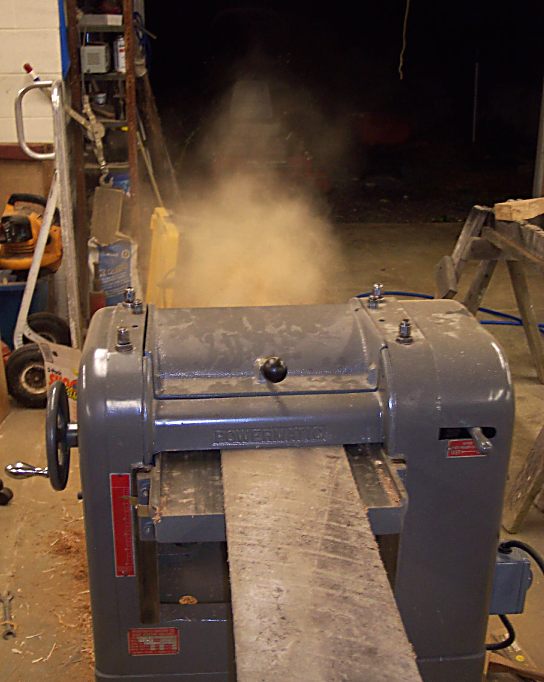
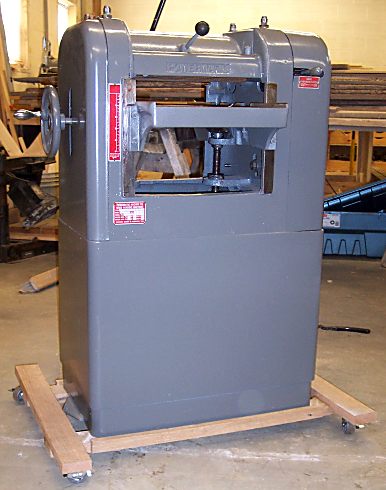
I love when I make bold statements like It shouldn't take more than 10 minutes to correct it. How wrong I was! The following is part of message I posted on the OWWM forum. I had no idea there was so much to setting up a planner! I have been through all the setting 3 times now and it's still not right. Not really complaining, just surprised. I guess I am really not on my third set-up as much as I am working the bugs out of the thing. At first I couldn't get the table to stay parallel with the cutter head. LESSON No. 1 Gears that were not properly installed and that have play in them will allow one side of the table to move before the other did. So one time one side would be high and the it would be low. Took a while to find that one and get it all adjusted out. LESSON No 2 always remember to TIGHTEN the sets screws when you done. Snug doesn't work. LESSON No 3 Gibbs need to be very snug, but not tight. That was minor but when your dealing with these measurements it was causing some inconsistency. The only way to see it was with the dial indicator. Because you couldn't see any movement in the table but it was there! LESSON No. 4 Remember that once you re-level the table with the cutter head to recheck everything else! (See Lesson No. 2) LESSON No. 5 If your feeder rollers are not level with the table which is level with the cutter head Your stock will try to creep to one side as if feeds through. (see Lesson No. 4) LESSON No. 6 Make sure that your pressure bar moves freely up and down and doesn't bind. Hope you paid attention! If you ever rebuild a planer there will be a test at the end. |