| Ā | Ā
Stack Dado Setup Guide
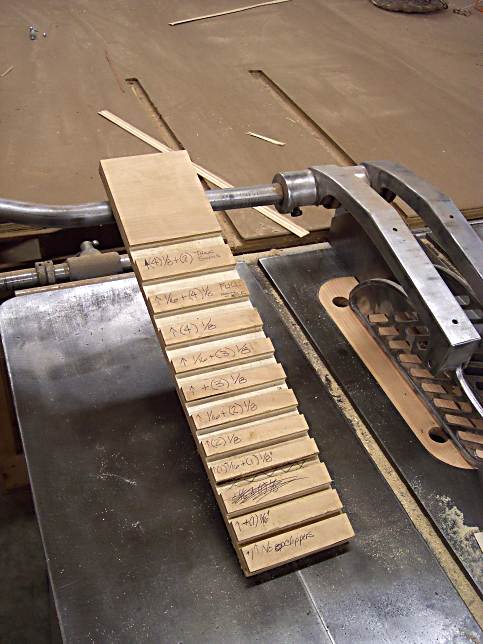
For me one of the most frustrating things about working with a stack dado is getting the width right. It used to dread it, adding and removing shims several times and making all those test cuts. I tried stacking them on the table and comparing the width to the stock but it just never worked. I had thought of making this gage block for a long time. But the thoughts of spending an hour or more swapping blades I just kept putting it off. Then one day I was faced with a dado cut and I decided to just bite the bullet. To my surprise it took less than 30 minutes and I am sure it has paid that back several times over! Making it is simple and it took me less than 30 minutes. I used a piece of Birch Plywood scrap about 12 inches long. I started with one of the chipers installed on the saw and I cut a dado with it about 1/4 to 3/8 inch thick. I write above the dado what blades I used. I then added the second chipper, cut the dado and made a note. I continue with this till I had gone through the whole stack. Click for larger image Now I can just put the gage block over the piece of wood I need to cut the dado for and I know what stack to start with. When I find that one dado is to large and smaller one is to small, I just slide shims in between the wood till I get a snug fit. Most time this will be right on the money. But when it's not, it's just a matter of adding or removing one shim and your there! "Why didn't I do this before now??"Oh, and when you have to make a cut with shims between the blades. Make another pass on your gage block and write down on there what you used. |